Tuesday, July 17, 2012

The Classic Testor's Corsair, Reserved

Over at the Replica in Scale blog a few weeks back, I stumbled upon a treasure trove of images of post World War II Corsairs. In the entry "The Last of the Deltas, Studies in Glossy Sea Blue, The Infrequent Model, Mystery Meat,and A Salute to the Cat", there is a section titled "Can You Hear Your Bluebird Sing?". There, you'll find an image of a Goodyear FG-1D Corsair in Navy Reserve markings at NAS Grosse Ile, Michigan, sometime in the late 1940's or early 1950's. 


There is nothing special about the plane, except for the fact that its markings are not quite standard. Clearly, the Corsair had seen better days, but it was inspiring in spite of its plainness. 
I decided to model this Corsair as an experiment of sorts using the classic Hawk/Testor's kit. First off, I decided to use an old favorite color of mine, Testor's Flat Dark Sea Blue, number 1172. When I was a teenager, I frequently used this color on US Navy aircraft of that period. Many purists twinge at the thought of using a color that is not quite a match, but in this case, it was justified; it looks slightly faded, as the Corsair does in that photo.
The next part of the experiment was to see how much detail could be eked out of the model using the barest minimum. In this case, that would translate into opening up the wing inlets, adding a little detail to the wheel wells and landing gear, and opening up the cockpit and adding a simple seat.
I chose to tackle the wings first. Opening up the wing inlets was a simple task accomplished with a file and X-Acto knife. Detail was cobbled together from scrap plasticard and an unusual corrugated Mylar ribbon I picked up nearly twenty years ago, and which still appears at some craft stores from time to time.

I used the same ribbon material to detail the wheel well interior.


Opening up the cockpit was a relatively simple task, made easy with knife and file as well.


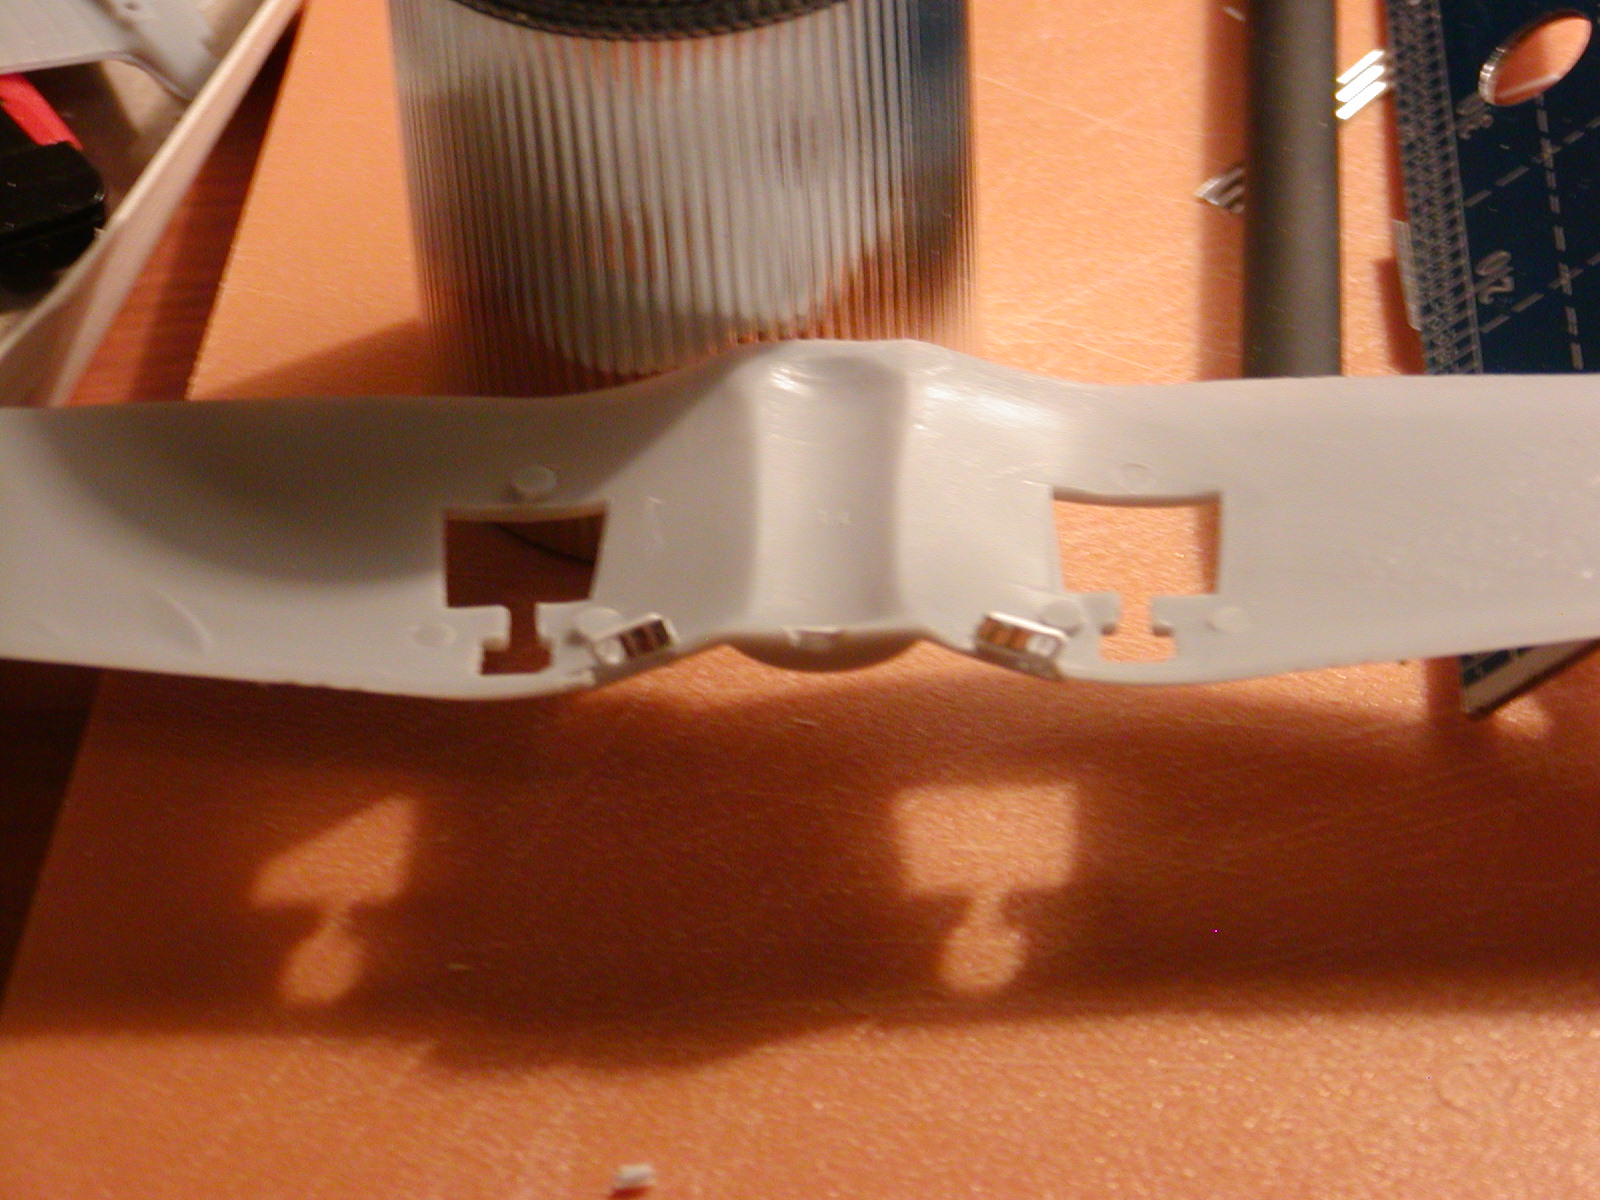
One thing I did notice about this kit. There were a number of minor short shots in the molding, as can be seen in the above image. These were easily taken care of with putty. One short shot, however, was a bit problematic if I had not planned on modifying the model's landing gear; the rear struts were short shot, something I did not discover until I began work on them. These were due to be cut and moved up the gear, however, so they really weren't a problem. 
The rest of the construction was fairly straightforward. The classic Testor's 1172 Dark Sea Blue, mixed with a few drops of linseed oil, was used over the entire aircraft, brush painted. The interior color is Testor's Zinc Chromate, a bit more yellowish but pretty close. A seat was made from scrap plasticard with harnesses made from drafting tape. The propeller was also slightly modified in shape, closer to the prototype's, and painted (note; the author had managed to break the prop's shaft, and had to resort to creative repair. In the end, it was salvaged and spins just fine). Once satisfied, the blades were painted flat black, with a silver and red hub.
I tried to stick strictly to the kit's decals, however had to use a full set of national insignia for the fuselage due to the international orange band. The "I" on the tail and starboard wing top were made from the arrow decals found in the kit, as well as a spare set from another Testor's kit. The "51"'s were created from the "157" decals, again using a spare from the other kit for the wing. The final decal modification was adding the red bars to the insignia; this was done by painting scrap decal material flat red and cutting out the lengths needed. They had a somewhat ragged appearance, but anyone who works with color in the field will tell you, red fades very quickly. Once the decals had set, some mild weathering was done using Testor's Silver paint, and the entire model sprayed with Dullcote. 


The landing gear were detailed with new rear struts cut from florist's wire, while the kit struts were cut and moved up closer to the wing.


Finally, two antenna were added from the plasticard stock and painted to match. Also, the cowling was rotated so that not only did the cylinders match the drawings better, the top three flaps were sanded and filled, as there aren't any there on -1 Corsairs and blending that section of the cowling into the fuselage. This was actually done after the vast majority of the painting. The final touch was some modest weathering along the propeller blade leading edge. 
With that, the model was declared finished.


It makes an interesting companion piece to another Testor's Corsair built more or less straight from the kit.


For the price, the classic Testor's Corsair has plenty of potential, not only for the beginner but us seasoned builders as well.
Edit - One thing I did fail to mention is how the canopy was handled. While a proper -1D series Corsair had a hood that was frameless, I used the kit's canopy as is, simply not painting those frames. Admittedly, this was the lazy way out, but then again in 1977, replacement canopies were unheard of and I always had problems making my own. A minor problem, yes, but one which still exists, and which I openly acknowledge.

Tuesday, July 3, 2012

The Lindberg 1/72 F6F-5


When 1/72 scale began gaining in popularity here in the United States, every major plastic manufacturer jumped on board, producing an increasingly diverse variety of aircraft. Duplications were frequent, however; both Hawk and Revell made Wildcats and Corsairs, for instance. Revell's line, though, grew fast and fairly large and soon grew to cover many subjects, especially aircraft of the Second World War.
Not surprisingly, Revell could not cover every subject in that series, so they concentrated on popular subjects. For some reason, though, it fell to Lindberg to produce the most common fighter of the US Navy during World War II; the Hellcat.

Released in the mid-1960's, The 1/72 Lindberg F6F-5 Hellcat was superior to their older 1/48 kit but still rather typical of their earlier releases. While the basic shape is fairly close, it does have a good many rivets, as well as some dubious panel lines (raised) and sparse cockpit. The landing gear bays are slightly misshapen, though this can be corrected easily with knife and file. The canopy, though thick, is clear. The engine, though, is only a "bas relief" representation at best. The six .50 caliber guns are also noticeably missing. A total of twenty two pieces makes up the model, including the stand. Markings are for a generic ship, "24". Make no mistake, however; the canopy and cowling clearly mark this as a -5.
Can a decent model be made from this kit?
I had seen the kit since at least 1970, at the Pic-n-Save near our Brookview house. My first chance to find out as a teenager was botched when a younger family friend proceeded to build the model in front of my stunned eyes (he literally just picked the model up along with my one tube of Testor’s Non-Toxic Cement, which he applied liberally, as if with a trowel, whilst rambling on about girls, stock cars and other topics). When I was fourteen, my best friend Craig picked one up and followed the painting instructions to the letter (Testor's Pla Enamel, colors which, by the way, are still being made), landing gear up. I envied that blue bird.
Having just acquired the kit again, my first since 1975, I plan on seeing just what can be had with this blue bird. It has potential, which I plan to squeeze out.

Thursday, June 28, 2012

Testor's Quick Build F4U Corsair


Let's start off with the fact that this is not my first experience with this kit. In fact, I have another in the spares closet right now. Breanna and I built one back in late 2010. I had purchased it for her so she and I could build a couple of models together.
It was when I was helping her that I realized that this kit had plenty of potential.
First, though, are the flaws. To be clear, I do not consider the lack of landing gear to be amongst these. It has two antenna, the aft being woefully wrong. Second, the propeller is somewhat thin. There is a minor dihedral problem where the starboard wing is up slightly higher than the port. The most noticeable problem, though, is a clear lack of mark. The forward cowling looks as if it came off an AU-1, but it lacks the hardpoints under the wings. In other words, it has features of both an AU-1 and an F4U-5.
On the plus side, it has a fairly nice though simple interior. The engine, whilst incomplete, is adequate enough, and the panel lines are engraved, though perhaps a tad too deep. Still, it goes together very well (as a snap together model should) and is actually something of a joy to build. What must be remembered throughout, though, is that this is a kit meant for beginners and novices. 
I chose to build mine up as an F4U-5, which meant that the cheek intakes had to be added. This was done using scrap from a plastic receipt paper spool and some Squadron Green Putty (vile stuff that I really should avoid, to be honest, due to my chemical sensitivities).

The other modification to the airframe was the aft antenna; it was reshaped from a thick "T" to a more normal appearing type, though it will probably be deleted altogether. The model was finished in overall Testors Acryl gloss Dark Sea Blue. 
The markings included in the kit are for two birds, including an F4U-1D from VF-84, basically the same as for Testors re-pop of the classic Hawk kit. The other markings are for a much later bird though somewhat nondescript. They closest resemble those found on Corsairs stationed aboard the USS Wright. I chose to base their positions following the example found at the Vought Heritage site. 
The end result was certainly pleasing enough, especially when one considers that we are still in the midst of a move and a goodly amount of my tools are packed. 


Now, let's see what can be done with the other. 

Wednesday, June 23, 2010

Kit(s) of the Day - The MPC Profile Series


In the early 1970's, there were some indications that interest plastic model aircraft was waining on the western side of the Atlantic. This was probably for a variety of reasons, though the biggest was that many of those youngsters that had started building these kits in the 50's and 60's had now aged, and many of the gimmicks that were used to sell the kits back then were failing. In the UK, of course, it was a slightly different story, with both Airfix and Frog booming along.
MPC was known stateside mainly for model cars in 1/24 scale. In the mid-1960's, they began to import, and later produce, Airfix kits. They used some unusual methods to get people to buy their kits, such as including chromed parts and wild custom decals for a while.
Obviously, that didn't work.
So, they took what can only be described as a more English approach. In the UK, a series of booklets had been published for a while known simply as "Profile Publications". Each of these booklets contained information on a single aircraft or variant, complete with, you guessed it, full colour profiles. When I was young, I would stand, mesmerised, at the book rack in Art's Hobby Shop, staring at the vast number of them he carried.
Anyway, MPC decided to use the Profile booklets as a starting point for a new line of Airfix kits. Each kit would come with decals for three different aircraft, allowing the modeller to choose which aircraft he wanted. In a way, it was akin to the customising that American car modellers had enjoyed for a few years at that time. Some kits even came with parts to allow different variants to be built, though this could be traced back to the dies that Airfix had tooled originally.
Suffice to say, the new line of MPC kits were a hit.
They weren't perfect, however.
Take the Wildcat, for instance.

When this model was being sold by Airfix, it contained markings for two aircraft; one Fleet Air Arm, the other US Navy. The plane itself represents an FM-2, the very last Wildcat variant built (and made by General Motors, not Grumman). This plane was a bit different than the original F4F-3 or -4. That didn't stop MPC from including decals not only for an F4F-3, but for an even rarer G-36, Grumman's early export model that the British ended up with.
This wasn't the only time they dropped the ball where that was concerned.
Then, there were the decals. My biggest complaint for years was how light the blues tended to be. Other decals, namely from later kits, were printed on material that was very thick and refused to adhere to anything but a perfectly smooth, flat and very glossy surface.
Still, the Profile Series from MPC introduced many people to the hobby. They were usually sold very inexpensively at outlets ranging from convenience stores to department stores. The line finally faded from public view around the mid-1970's, with the author seeing the last few kits vanish from our local Woolco's around 1978.
For the collector, the boxes are pretty nice, with information lifted directly from the Profile booklets. Sometimes, the colour information on the instruction sheets left something to be desired. The models themselves were almost always moulded in white, though I have heard reports of other shades such as silver and light blue being used. Beyond that, they were still Airfix kits, though under cover.
MPC would once again become involved with Airfix in the early 1980's, when they produced a number of kits as Airfix was going through some difficulties. These were a far cry from the old Profile series, basically being American reboxing's only. This would be MPC's last foray into military models. By the end of the century, MPC itself would be gone, to emerge later as simply a brand name only.

Monday, June 21, 2010

Building the Classic Airfix Hurricane Mk.IV


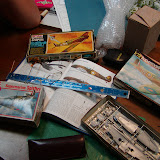
I decided that it was time to put together the Airfix Hurricane Mk.IV, and to treat the model with respect. In doing so, I decided to use techniques and materials that a model builder in the early 1960's would have had access to. I chronicled the build at the Unofficial Airfix Modellers Forum, and the images are up at Picasa. To say the least, I am very happy with how this has turned out. In fact, this model looks better (to me) than many of my more modern kits.
Pleased I am!

Tuesday, June 15, 2010

The Great Spitfire Mk.I/II Quad Build of 2010


There are just some models that have to be built. You know the ones; they have been sitting in your collection for years. For me, it was my two Hasegawa Spitfire Mk. I's. I had planned on building one up as the Spitfire prototype, but there were too many issues.
The fact is, while these models look nice enough, they have numerous issues, the most noticeable being the lack of the "gull wing" underside.
Then in April of 2010 I located a Heller Mk.I.
With the purchase of the Heller kit, I decided to compare the different early Spitfire kits, which I of course had to blog about.
A couple of weeks later, I managed to obtain the Revell Spitfire Mk.II (really a Mk.I), primarily for its decals. Aside from the Frog kit (which is the oldest Mk.I Spitfire), I now had four classic birds.
That's when I decided to build them all simultaneously.
I chronicled the build at the Unofficial Airfix Tribute Forum and also posted the images on Picasa (link below).
Was it fun? Certainly. For a couple of weeks, I was fifteen again. Like all my builds, I build for myself and not for contests. This build may not have produced prize winning models, but it sure was nice to just build for the sake of the build.

Spitfire Quad Build

Friday, June 4, 2010

Modelology

If someone were just getting into plastic model aircraft today, they would be startled at the sheer abundance of kits. This was not always the case; when I built my first model airplane in 1970, there were mostly injection molded and vacuformed kits and conversions. Resin parts were still some time off, and while there were some metal components available, photo-etch was nascent.
For us, it was styrene stock, plasticard and what we could salvage from other sources. Decals were just coming into their own. We relied upon the manufacturers to provide us with usable kits.
Not that the manufacturers made it easier.
Often times, they had kits that were not carefully researched. Take for instance the classic Hawk SBD Dauntless. The kit came with markings for an SBD-3, circa 1942. The model also came with national markings molded into the model, by the way; I suppose one could go back and simply paint the roundels on. The problem is that, aside from being quite simple, the kit is actually an SBD-5 (which later Hawk kits actually claimed on the box art). The navy markings are simply wrong for that make. Converting it to an SBD-3 involved a little work, most notably adding that scoop to the top of the cowling.
Airfix, to their credit, did a better job than most for us 1/72 modellers. Many kits had optional parts (their original Hurricane Mk. II is literally a spares factory, with parts that they never bothered to provide markings for!). Their SBD kit contained parts for both a -3 and -5. If one wanted to model both aircraft accurately, you now had the ability to do so, perhaps even swapping the Airfix -3 cowling for the -5 cowling on the Hawk model (it boggles).
A few other companies jumped on the bandwagon, but the good folks at Airfix made it an art.
But, before I go off and make this an article about the thrill of collecting spare parts for the bin, let me get back to my main point. The parts article will be another time.
Many of these early manufacturers have to be forgiven for their occasional poor choices. Frequently, the access they had to information was scant and often plain wrong. Perhaps they had drawings for one aircraft variant but wanted to produce another. Then came the task of marketing the subject; they needed to make it popular. Hence the wrong markings on the Hawk Dauntless. The SBD-3 from the Battle of Midway was far more interesting than a later SBD-5, certainly braver. Hawk also did this again with their Spitfire F.Mk.22. The model represents an early Mk.22, probably a prototype based upon the fin, yet the markings seem to depict... nothing. The later Testors release of this kit repeats that sin; this is a plane that did not exist. But it is still an important variant and for many of us filled a void.
Frog was another company that made these faux pas quite often. They sold their first Spitfire (originally labeled a Mk.II) as a Mk.Ia/Va. There are minor differences between those variants, yet it allowed Frog to model two very important aircraft; a Mk.I from 19 Squadron and Douglas Bader's Mk.Va.
Lest we think that the trail ends there, that these older companies have been shuttered and their products relegated to the waste bin of history, they still live on, and not only in their influence. The Frog dies, for instance, were divided between Revell-Germany and Novo, a Russian company that has long since bellied up and given us Eastern Express. Not only that, but Frog's Spitfire Mk.I/Va seems to have influenced (if not, almost been copied by) PM Models Spitfire tropical Mk.Vb/Vc and all of its variations. While I've not seen it, I also suspect that the same might hold true for their Sea Fury. Academy of Korea has also copied a number of Frog kits, notably the Wildcat, P-40B, TBF and Lockheed Ventura. Many of the older Airfix dies have been acquired by Bilek, an eastern European concern. And, of course, many of Hawk's models live on through Testors, and lately Lindberg (which is a whole other subject).
That is what we had to work with back then.
This searching for the roots of these models and model building can be best described as "modelology", the science of styrene divination, the archaeology of the plastic model. This goes beyond simply collecting and comparing the kits to drawings and newer offerings. This also involves the building of the kits, using the techniques that would have been available to the average modeller of a given period, to see if, indeed, better models could be created. The period I've chosen is the mid-1970's to 1980. A model made after that point is subject to newer techniques, and indeed there are probably better models available. There may occasionally be better research and decals, as well as correcting the issues with colours (namely those pesky Luftwaffe aircraft), but if the model dates or was available during a given period, it should be built as if I were in that period.
There are a few compromises, though. I discovered acrylic based wood fillers in the 1980's, and they have been my filler of choice since, but otherwise work, for me, as well as the putties available in my youth. I also have to use non-toxic cement (the citrus smelling stuff) due to chemical sensitivities, but this has been available for a few decades now and indeed was used when I was a lad.
So, welcome to modelology, and enjoy modelling the way we used to. Feel free to set the resin and the photo-etch down now.

Monday, May 24, 2010

Revell Goes True (1/72) Scale!


Imagine it's the early 1960's. Plastic model building is really starting to take off, especially here in the States. All variety of plastic models are available; ships, cars, space, aircraft. The latter, model airplanes, were usually the most inexpensive of the lot, and many model builders got their start with them.
The US, though, was slow to jump on the scale bandwagon. While model cars were being turned out in scales that were either 1/24 or 1/25, it took longer for model companies to care about them. Well, perhaps that isn't quite true; Monogram and Hawk were certainly turning out kits in 1/72 and 1/48, especially the larger of those two scales, and Lindberg was producing a few kits in 1/64 as well.
It was the plastic powerhouse Revell of Venice, California that lagged a little behind. Keep in mind that by the early 1960's, both Frog and Airfix already had extensive lines in 1/72. Most of Revell's kits were "box-scale", designed to fit a box, not a regular scale. You had aircraft as large as 1/45 sharing a common box size that also held models down to 1/180. The scales were all over the place.
When Revell decided to go to a true scale, they chose 1/72 for their aircraft kits. By the mid-1960's, they had a large number of World War II fighters and bombers, behind only Airfix in their offerings.
But these weren't Airfix quality.
While they were fairly good at capturing the appearance of many of the aircraft, most of the kits lacked good detail. Some parts were just wrong (quite often the landing gear), while others were stretched (their Spitfire Mk. II's fuselage) or squashed (canopies on the Spitfire, P-47D and F4U-1D). Some kits were surprisingly good (their Wildcat and Hurricane), others not. The kits also felt thin and somewhat flimsy. This is something I always felt about Revell's kits from this era; the plastic parts always felt thin. As the dies aged, this thinness presented further problems, namely flash and quite often short-shot parts.
For us here in the States, though, the presence of scale kits meant that we could now build accurate collections. Want to see how small a Bf-109E was next to a B-17F? All you needed was the money for the kits. The American molded Revell kits were inexpensive to boot, always lower in cost than imports, so you could build a collection relatively inexpensively.
The photo I've posted is of three of the fighter aircraft in various boxing, from 1963 (the P-47D), 1974 (the F4U-1) to 1988 (the Spitfire). For many of us, this was the only way to have some of these models in our collection, so we learned to either live with the shortcomings or honed skills to correct them.
For the average builder today, these kits have long been supplanted; there is not a kit from this series that hasn't been replaced. Those of us who love nostalgia, however, look upon them with most assuredly rose coloured glasses.

Thursday, May 20, 2010

My First Hurricane


It was back around January 1977. I had just had my heart broken when my crush Cindy Brookes abruptly exited my fourteen year old life (she changed schools), so therefore I sought solace in plastic.
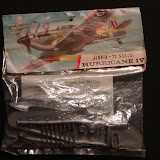
The plastic I chose that week was the Airfix Series I Hurricane Mk. IV.
This kit is ancient, dating back to the late 1950's. Aside from the packaging, little had changed about the model in all that time. When I bought it, it was in the later blister pack, and was soon to be relegated to history (though I can't say for certain when Airfix discontinued the model; before 1980 seems the likeliest answer). The model went together with relatively great speed. It was poorly camouflaged, using Testors Dark Gray and Pactra Forest Green over Pactra Confederate Gray. It also didn't last long, being traded away shortly thereafter once I discovered that the MPC Hurricane Mk. II was the newer Airfix Mk. II.
I did manage to get the model back some years later and tried to convert it into the Iranian Air Force Hurricane trainer. Suffice to say, that too was a disaster.
There are a lot of problems with this kit, make no mistake. While it does capture the overall shape of the prototype fairly well, the landing gear covers are the wrong shape. The same could be said for the horizontal stabilizers, being a little awkward as well.


There is no interior. In fact, there isn't even a seat. The pilot is simply glued into place on pins.

However, this model represents an important step in the development of the close support aircraft and an important Hurricane variant.
Can it be salvaged?
Of course it can!
There are a few things that can be corrected right off. First is the interior... or lack thereof. Some plasticard (sheet styrene) and odd bits from the spares box could certainly be used. New landing gear could easily be assembled from steel wire, with new gear covers from more plasticard. The wheels, whilst not perfect, are adequate. The problems arise in reshaping the landing gear wells; they match the landing gear themselves. There will need to be quite a bit of reshaping needed.
Will the end result be worth it? It depends upon ones point of view. While there are certainly better models out there, the challenge of taking an old dog and teaching it new tricks has its own rewards. For me, that is what this hobby is all about.

Wednesday, May 19, 2010

Battle of Britain Indecision

Decisions, decisions.
One of the things I've set out to do this summer is to model the aircraft of the Battle of Britain, with a particular slant towards the RAF and their brave effort. To that end, I have managed to secure a few aircraft models, though, admittedly, I am top heavy with Spitfires (what can I say, I'm a Spitfirephile). Of the Luftwaffe aircraft, I only have three; the Airfix Ju-87B, the MPC/Airfix Ju-88A4 and a bagged Airfix Bf-109E.
Here's where the trouble occurs.
You see, the Bf-109E kit was purchased for $1 in a Heller T-28 box with parts from other Bf-109's, an F and a K. Nothing was guaranteed at the time of purchase, and let's face it, $1 is very little money even for a bag of parts. In the latest analysis of the box, here's what I have -

-a nearly complete Heller Bf-109F, sans canopy
-an Airfix Bf-109E... missing many parts
-the wheels and cannon from the old Airfix Bf-109G
-a single sprue of Bf-109K parts
-three Bf-109E canopies; two Hasegawa, one Airfix

It was the Bf-109E I really wanted to build first, since it was on strength with the Luftwaffe during the Battle of Britain. It is very far from complete (horizontal stabilizers, braces, landing gear covers, tailwheel, seat, scoops). I could use the Heller Bf-109F kit to complete the Airfix model, but some parts won't work right; besides, I don't want to wreck a classic model like that (anyway, one of those "E" canopies can easily be modified to work with the model).
I could scratchbuild the missing parts, or hit the spares box.
Or I could just wait and buy another model.
If the Airfix Bf-109E is to be written off, then what kit next? An early combatant, perhaps? That'd be one of my Hurricane Mk.I's.
I have two of the wonderful Airfix Hurricane Mk. I's, plus the older Mk. I/IIB kit (not as wonderful, but okay). One of the Airfix kits is actually the Heller issue and comes with markings for a ship from the 306th (Polish) Squadron during the Battle of Britain, but there are questions about the propeller used, and some minor details that need to be corrected (the anti-dazzle plates ahead of the cockpit). The right proper Airfix kit is for Robert Stanford Tuck's "DT-A" and appears to be close to 100% accurate; this will probably be the first of the Hurricanes built.
If I go that way.
Still, the challenge of scratchbuilding the missing pieces for the Bf-109E has a strange allure to it. Now, if I can just make up my mind.

Tuesday, May 18, 2010

The Gift of a Book


Today seems like a good day to write about memories. For a number of reasons, actually. If this were some point 33 or so years ago, my best friend and I would be celebrating his birthday. From those long ago teenage years, very little remains; a few photographs, two small paintings, a beloved wooden box. But I have memories, and I cherish them as if they were gold.
From a few years later, I do have a book, though perhaps not the original. This was an unexpected gift from my stepfather, my Dad. It isn't much, "Fighters of World War II" by Charles W. Cain and Mike Jerram. It's actually a compilation from the "Profiles" series of books, something many hobbyists and aircraft enthusiasts were fond of.
Dad was just returning from a trip to Connecticut, just prior to the beginning of my senior year at Sandalwood High School, I reckon August of 1980. It was really unexpected; he just walked up and handed it to me.
I loved it.
Between the covers were the basic histories of fifteen different aircraft, specific models and variants in fact. I had planned to build each and everyone of them in miniature, 1/48 scale.
I had to put it off, though, so I could salvage my sagging grades and graduate on time. I managed to build two of the aircraft by the end of 1982, more than two years later.
As much as I loved the book, I had to relinquish it. We needed to eat, I had racked up a huge dental bill and our lives were from paycheck to paycheck. Many of my books, including this one, were sold just so we could eat.
It was last year that I stumbled across this one at Chamblin's Bookmine here in Jacksonville. Incredibly, there is a chance that this one may indeed be my copy; there are erasure marks were I am certain I wrote my name way back in 1980.
Perhaps I am wrong.
I was certainly pleased to locate it again, even if it isn't the original. It is something I wished I never let go to begin with, but now that I have it again, I would certainly like another crack at those aircraft.
Thanks, Dad.

Monday, May 10, 2010

Classic Kit of the Day - My Very First


It was just over forty years ago that this obsession with model aircraft began. Sadly, I do not remember the specifics of when it was bought, but I do remember it was at a five-and-dime. Every time we went in there, I would wander back to the model section. Right next door was Art's Hobby Shop, and I was not allowed to go in there alone (Art's rules, and I can't blame him), and mother was not interested in going in there either. So it was the five-and-dime, and their selection of models.
To be honest, they actually had a pretty good selection. Three companies were stocked for certain; Frog, Hawk and Lindberg. There were only a few cars, and those were Lindberg, if I remember correctly. I really wanted one of those Frog kits, but for our family, they were a little pricey. We were struggling to make ends meet.
So my eyes always went to the lower shelves and the smaller Lindberg kits. They sold for $.29, and at that price I was sure I could get one. It took a number of attempts, but mother finally caved.
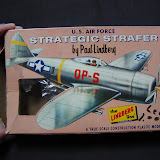
And I came home with the Lindberg "Strategic Strafer".

We will not go much into how the build went. I was a seven year old boy, so obviously there were flaws. The landing gear were messed up, the machine guns botched, but the rest of the model looked alright to my young eyes, even if the propeller couldn't spin. But it was my first model airplane, and I loved it.
The "Strategic Strafer" is actually a P-47D Thunderbolt in 1/81 scale, which is almost American HO scale (1/87 scale). It is a very simple model, dating possibly from the 1940's. It might not even be a Lindberg kit originally. There was another company at the time named Olan that turned out a few kits. Lindberg bought the line a few years later. This model has many of Olan's traits, in particular a complete lack of rivets. Lindberg would eventually make a right proper P-47B in 1/72, but this kit has some issues of its own and has a different "feel" than this older model.
It's not perfect, but is very representative of plastic model kits from that period. The wheel wells are filled in, and there is no cockpit. The pilot is simply a head on a deck (ARRRGGGHHH!). The engine can only be described as bas relief. But the landing gear covers are actually the right shape, and the wheels looks decent, though I question their accuracy.
In overall shape, the model captures the lines of the P-47D decently though not 100%. If built by a competent model builder it could be made into a nice desk model.
There are some things about this kit that I had forgotten about, though. One is that the propeller does not spin. The prop itself is a nice representation of a Hamilton thirteen foot model, though. With a little ingenuity, it could be made to spin.
The one thing this model did not have when it arrived was a canopy. The first P-47 that was modified to a bubble canopy was a P-47D-5. The engineers at Republic took the canopy from a Hawker Typhoon and fitted it to the modified Thunderbolt, which the company designated XP-47K. When it entered production, it would be renamed P-47D-25, and the new purpose built canopy was a little longer. To create a canopy for my model, I took the spare canopy from my old Airfix Typhoon and added it to the kit.
I'm really looking forward to this build. Sadly, this is actually my Father's Day gift, so for now I have to sneak the model back into the cabinet and pretend it never, ever left it.
Of course, Jamie will read this, so...

Lindberg Strategic Strafer P-47D

Saturday, May 1, 2010

Classic Kit of the Day - The Hawk T-6 Texan

After my first few model airplanes (the Lindberg "Strategic Strafer" P-47, the Airfix Boulton Paul Defiant, and, I believe, the Airfix Fokker Triplane), my mother would allow me one kit per week. But, if I was clever, I could buy two lower cost models. The two companies whose kits were indeed cheap were Lindberg and Hawk. The Hawk T-6 (as well as its Navy version, the SNJ) were plentiful at the local Pic-n-Save Store, selling for half the 1/48 kits; around $.59. I actually bought the T-6 and SNJ on the same day.
Imagine my surprise when I discovered they were the same kit.
Well, not exactly the same. The T-6 was molded in silver, the SNJ in yellow, and they had different decals. But they were the same airplane. I believe I even swapped canopies to see if it could be done; of course it could!
The model has a history dating back to the 1940's, and indeed may have been derived from the recognition models Hawk was contracted to make for the war effort; many of its features are very similar. It has much in common with Hawk's SBD-5/A-24 as far as part breakdown is concerned. Incredibly, this kit, as well as their SBD and Corsair, is deficient in rivets. Normally, model builders complain about rivets, as they really shouldn't be so noticeable. However, the aircraft still had them, if subdued. The T-6/SNJ only has them on its wings.
As for the kit itself. Aside from being very simple, it really only represents a T-6, specifically a T-6G, a postwar variant. It lacks all of the changes necessary for it to be an SNJ, though the Navy did have a variant that was very similar, the SNJ-X-7X, which was not very common. When Testors acquired Hawk, they did produce a more accurate SNJ, though this model is long out of production.
My kit is a 1965 production run. The box is great; they don't make them like this anymore.


There is some writing on the box that indicates something of this models history.

"LAOS"? Was the original builder planning on making a model of one that served in the Laotian Air Force? Maybe one from the Vietnam conflict? Who can be sure.
There are just twenty one parts in this kit, not including decals. To Hawk's credit, the decals represent a real T-6G as it appeared in the late 1940's - early 1950's. While the decals are slightly yellowed, with a little work they should do. The fit of the parts is extremely good, and the panel lines are recessed (something not too common on kits from this period). The interior is very basic, no interior at all really. Also, the national markings are molded directly into the plastic. This was a real bear of a problem if you chose to use different markings. Back in 1977, my best friend Craig and I were running short on Japanese aircraft for our little "war games" (more like "arms race"). We took the same path that film makers took when they needed Japanese aircraft, we used Hawk's SNJ and T-6's, with spare decals or handpainted hinomaru. That was not enough to cover the markings, as you could still see the bars aside the hinomaru.

Later kits had instructions as we know them today, with illustrated step by step instructions.
These instructions have directions above them (I can't help but think about a recipe - "Take 1 cup of flour, 2/3 cup sugar, some butter...").
The rest of the kit is not bad. The canopy is of the large paned variety (per "The T-6 Modeling Page"), so it really is a better representation of an Air Force T-6G. The decals have a black antiglare panel, when in reality they were olive drab.
However, there is one thing that looks odd, and that's the crewmen. There are two, and, yes... uhm... they do look vaguely human, though the look as if they were in a "Star Trek" transporter accident. They are also oversized. Note - girlfriend's red hair for scale.

This model, while very much a collectors item, is destined to be built. The model had some damage to it already, the tailwheel was broken off. I re-attached it with CA glue for these images. I'll make some basic improvements, mainly a new interior. Otherwise, this classic kit is to be built and decorated as the plane it represents.
Should be great fun.

Wednesday, April 28, 2010

Classic Early Spitfire Kits in 1/72... Or Thereabouts

During the peak of my teen model building years (1977 to 1979, when I was turning out roughly a model a day), the Spitfire enthusiast had a few choices. Oh, don't get me wrong, there were plenty of conversion kits out there, but for the average model builder, or the younger ones, standard kits were the only fare. Depending upon the variant you chose, you either were faced with true beauties or mediocre.
It was around this time that I discovered that each manufacturer had their own approach to the plane, with some better than others. In March of 1978, I found a number of Revell battle scene kits that usually consisted of two to three aircraft and a box that would convert into a diorama of sorts. One of these was a Battle of Britain type set that contained a Spitfire Mk.II and a Bf-109E; I know that there were three planes in the kit, I just don't recall which one was doubled. The Spitfire Mk.II really fascinated me, though to my fifteen year old brain it did not look quite right. Still, Mayport Naval Station's Hobby Shop had the kits at $1.39 each, so I walked away with two of them.
I do remember that Art's Hobby Shop had also found some of those Revell Famous Fighter Plane series models in his storage room, and he brought those out as well, marked still at $.79 a piece. Either way, I soon had a number of the Revell Spitfires, bumps and all.
Still, they looked odd. It was when I picked up another Spitfire (the old Heller Spitfire Mk.Vb) that I discovered that the Revell kit was too long (Spitfire Mk.V's were the same length as Mk.I's and II's sans propellers). Painted and displayed, however, the models didn't look so bad.
Aside from the Revell kit (which I currently do not have in my collection), the 1960's through 1970's saw a few 1/72 early Spitfire kits produced. In addition to the Revell kit, there is an earlier Frog kit that is not shown here, though its heritage can be seen in the PM Models Mk.Vb.
The eldest Spitfire in this collection is the Heller Mk.I, with dies that date back to the 1960's, followed by Hasegawa's offering from the late 60's - early 70's.

In 1975, Monogram released a SnapTite Spitfire Mk.II. This is its current incarnation.

Not shown is the packaging for the Airfix Spitfire Mk.I, released in 1978.
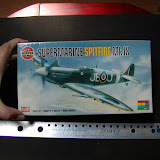
When you open the traditional kits and compare them side by side, you see that all three kits are fairly decent, with the Heller kit on the left, Hasegawa in the center and Airfix on the right. The Heller kit has rivets, though they aren't too bad. The Hasegawa kit is unique in that it allows the builder the option of building a very early Mk.I with flat canopy and two bladed propeller, whereas the Airfix kit is fairly simple but almost dead accurate. In fact, the Airfix kit was derived from their earlier Mk.Vb, released in the early 1970's and also very accurate.

It's when you examine the wings that you discover the big errors. While the Heller and Hasegawa kits are fairly well detailed, they botch the shape of the wings, in particular the undersides. Only the Airfix kit (right) gets it correct. In fact, the Hasegawa kit has other issues as well; what are those "strakes" on the wings? This was a problem that most Spitfire kits had at this time, failing to model the slight gull wing.

As for complexity, the Airfix kit, in addition to being the most accurate, is the simplist. The Heller kit, though, has three full sprues, though fewer parts than the Hasegawa kit (just a note; I've not included images of the canopies here; my camera was having issues taking them).


There is another issue, though, and again it involves the Heller kit. Years ago, when trying to combine parts from the Heller Mk.Vb and I, I discovered that the earlier mark was smaller. It seems that Heller's Spitfire Mk.I is actually 1/75 scale, just slightly smaller than 1/72.

So much for the traditional kits, how about the Monogram SnapTite model? Well, in its current form, it is a Revell kit, labelled 1/72, and curiously pre-painted.


The colors don't look right; that "brown" (supposed to be dark earth) looks too red, while the green is light. The plastic is molded in a color that is close to sky, though a little dark, and the markings are painted on (curiously, the plane they represent is a Mk.I, the "County of Chester", 610 Squadron, Royal Auxillary Air Force, during the Battle of Britain, 1940).
Again, the kit is labeled as a 1/72 model. It is not; it is 1/64 (see previous entry). Compared to a 1/72 kit, it is quite large.

And again, as with too many Spitfire kits, the underside is wrong.

Which model do I recommend? Aside from the Monogram/Revell SnapTite model, the only one of those classic kits that is still available is the Airfix kit, and amazingly, aside from very basic detailing and raised panel lines, still represents the Spitfire Mk.I best. With a little work, it can be made to represent all of the early "A wing" variants.

Tuesday, April 27, 2010

Some Notes About Scales

So, perhaps you're wondering, why 1/72? Why not something else, say 1/50 or 1/100, something nice and round perhaps. Well, I've given this a lot of thought myself, and I think we have the English to blame for this wonderful (there, I said it) scale. Yes, I really do think it is the best scale for my model building.
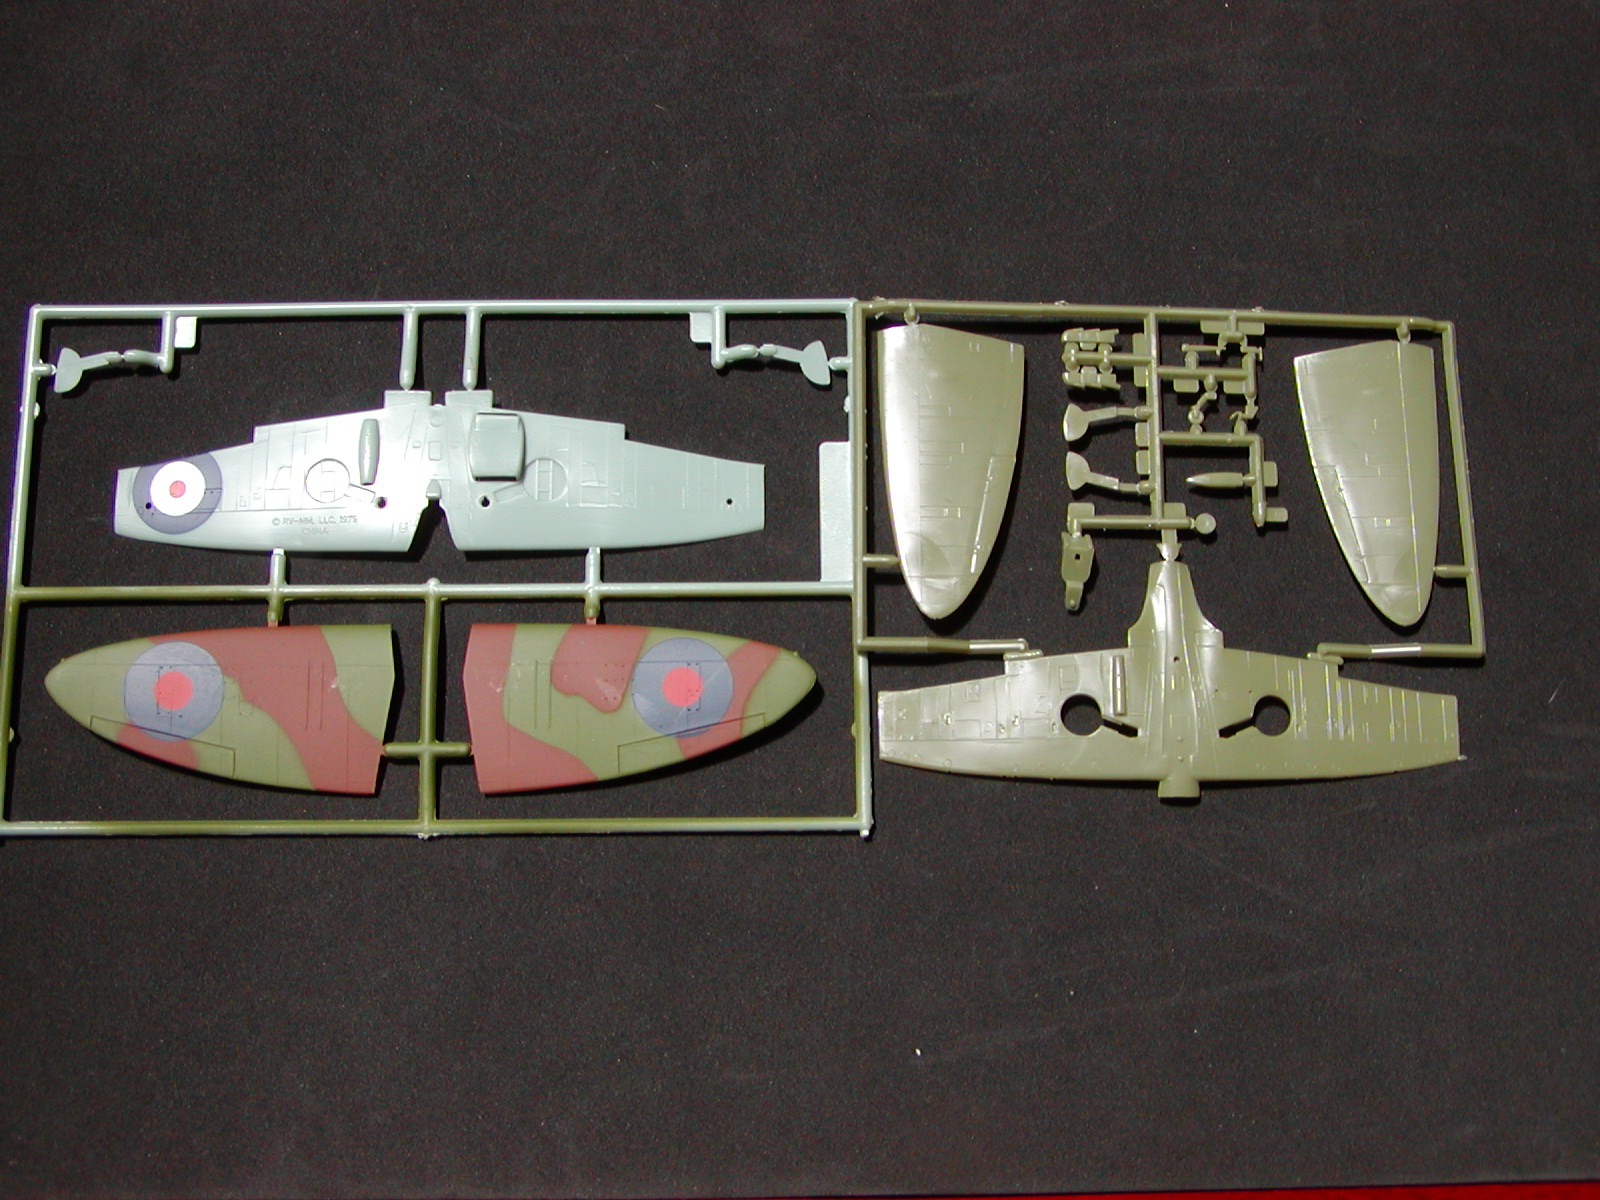
In my personal collection, I try to stay as close as possible, allowing some deviations, usually within 10% larger or smaller. The reason is that there are still some older kits out there that might not be exactly 1/72. Very occasionally, I stray beyond that 10% limit.
The first model company that made 1/72 aircraft was Skybirds out of the UK. Their models were wooden, with little bits of metal detailing. They began production in the early 1930's. As to why they chose such an odd scale is subject of some debate. A normal English standard ruler is divide into fractions based on a logical procession; 1/2, 1/4, 1/8, etc. 1/72 is 1/6 of an inch equals 1 foot. It doesn't make sense to most; why that scale?
Well, it so happens that there were rulers a foot (sorry; had to) that used 1/6" measurements, and these were normally used by typesetters. You see, 1/6" is an English Pica, the standard measure in typography. The folks at A.J. Holladay & Company simply used that measurement to create a model scale that would allow the average person of limited means the ability to build up a nice little collection at low costs, and yet make the models just large enough to be easy to build.
FROG Models, which started out making flying model airplanes, soon got into the business. They had discovered that the same process that they used for creating the propellers on their flying models (casting them from cellulose acetate) could be used for making model airplanes as well. They followed Skybird's example and chose 1/72 for their FROG Penguin line, which ran until the late 1940's.
By the 1950's, both FROG (which had gotten back into the game, though they dropped "Penguin") and a new company, Airfix, began in earnest to produce models in constant 1/72, or as close as they could get (there were a few kits that strayed into odd scales).
On this side of the pond (that is to say, here in the US), the predominant scale was 1/48, which works out to 1/4 inch equals 1 foot. Easy scale for the average builder. Until the advent of styrene models, it held a strong grasp on the market. However, World War II would introduce a challenger; the Department of War wanted recognition models in 1/72. Some companies (including Hawk) would make plastic recognition models, some of which would evolve into kits.
There was another scale, though, that could have eclipsed 1/72 for compactness. A typical World War II fighter plane in 1/48 scale has a span of between 8 and 11 inches (about 200 to 275mm). For someone living in a small house or apartment, a few kits would soon take up a lot of space, and larger multi-engined aircraft could be huge. But, in the 1930's, A.C. Gilbert introduced S scale model trains, which used the scale of 3/16 of an inch equals 1 foot. This was 1/64 scale.
1/64 scale did not catch on as a model airplane scale, though. Some of the early injection molded airplanes over here, namely the Revell B-25B/C and the Monogram B-25H, were close. Revell had a real tendency to produce "box scale" models which worked out to a variety of scales, none of them constant, and a few of their later models were again very close (the Douglas Skyrocket, the X-15 and the Douglas X-3 come to mind). One American company, though, chose to make kits in 1/64, and chose to say so. That was the Lindberg Line.
In the late 1950's, they introduced a series of bombers in 1/64; B-17, B-58, Ju-88, and an He-111. On the side of the boxes, they proudly proclaimed that the scale was 3/16"=1'.
And that was it.
Lindberg would then begin producing models in more standardized scales, with a good number of 1/72 models being tooled in the mid-1960's.
That wasn't the end for 1/64 scale model aircraft here in the states.
In 1975, Monogram, known mainly for their 1/48 kits (though they did have a nice selection of 1/72 models) produced a series of 1/64 Snap-Tite model airplane kits; a Spitfire Mk.II, a P-51D, a P-40E and a Bf-109G. Why they chose this scale is a mystery to me. Perhaps they chose it as a compromise. There was already a standard box that size, allowing the models to be small, but not so small as to be difficult for the target audience, very young model builders. Regardless, it was the last hoorah for 1/64 scale model airplanes. In the US, 1/48 would soon take over as the most common scale for "serious" model builders. Elsewhere, 1/72 would remain as popular as ever.
One more note; a company out of Israel known as Starfix has a random production run. From time to time, they produce a Messeschmitt Bf-109 and a Spitfire that are frequently labelled 1/48. I'm not certain of what scale they are, but I somehow suspect that they might be closer to 1/64.

Sunday, April 25, 2010

A Couple of Hawk Sea Birds


Some of the first models I built were by Hawk Models out of Chicago, Illinois. This company had a proud heritage, starting with solid wood and balsa models in the 1930's, mainly in 1/48 scale. They were one of the first companies that embraced plastic injection molded models, starting with recognition models during World War II, in the then accepted standard of 1/72. They would return to 1/48 models in the 1950's, but did have a small number of 1/72 kits, some of which could be traced back to dies used for those early recognition models. In the mid-1960's, Hawk produced its last 1/72 scale aircraft, four very simple kits designed to be somewhat accurate but very easy to build; a Spitfire Mk. 22, a Mitsubishi A6M-5 Zeke, a Messerschmitt Bf-109G (actually a Bf-109F) and a Grumman F4F Wildcat, though in actuality it was an Eastern Aircraft FM-2. By the early 1970's, though, Hawk was doing poorly as interest in plastic model building waned in this country, and soon Hawk was acquired by Testors, another Illinois based hobby company, first as a subsidiary but soon disappearing altogether. Currently, the remnants of Hawks models are split between Testors and a new Hawk Models, a division of J. Lloyd International, a toy manufacturer who also owns Lindberg Models, another childhood favorite.
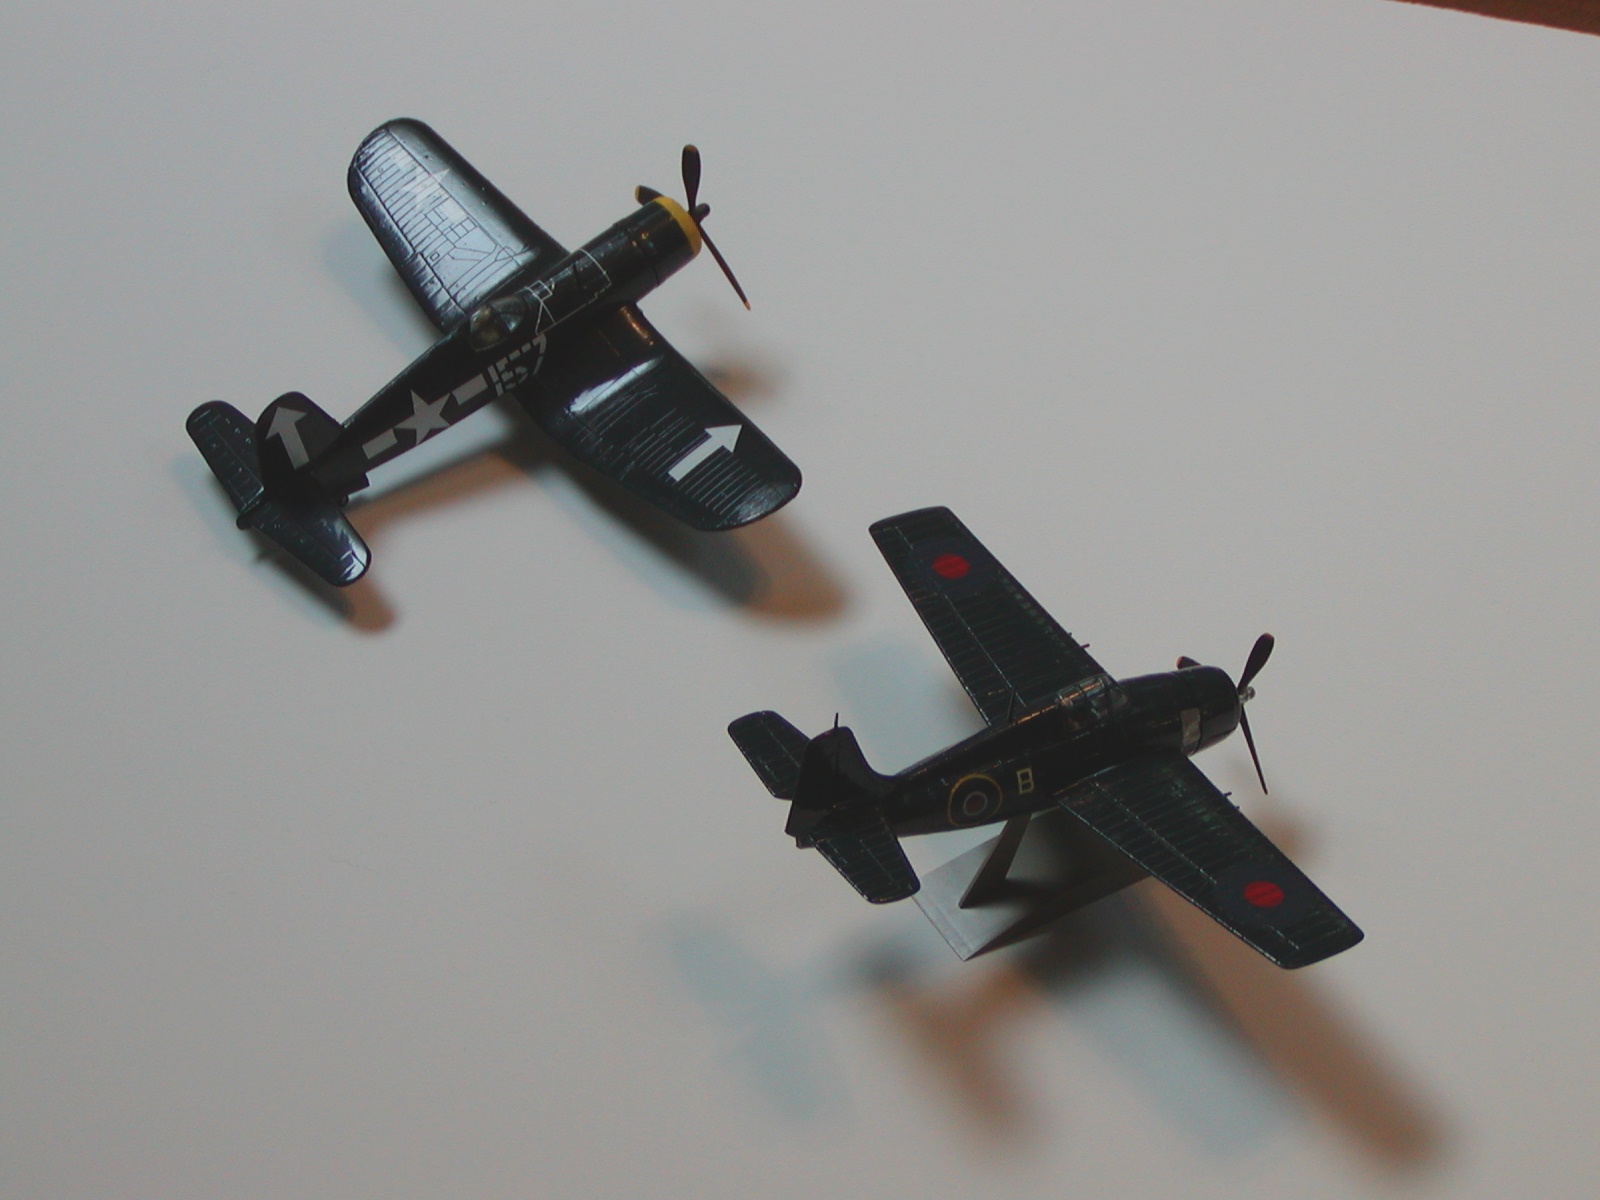
Both of these models are Hawk in origin, an F4U-1 Corsair and the FM-2 Wildcat, with the latter being an original Hawk kit from 1967, whilst the Corsair is a recent Testors reissue.
The FM-2 is the simplest of the two, scarcely a dozen parts including the stand. It normally comes with no interior, basically a hollow kit. Landing gear weren't included with this series of kits, though it is certainly possible to build them if one so desires. I chose to keep the model as simple as possible, the only changes being made were to cobble together a simple cockpit for an Airfix pilot.

There is also no molded engine detail. I could have opened up the cowling and added one, but instead chose not to.

As for the markings. I wanted to have it represent a late war Wildcat VI for the Fleet Air Arm, though the markings are basically just representative and not for any particular aircraft. The color scheme is overall glossy sea blue (Testors Acryl), the decals from the spares box. A couple of decals did not take well and silvered around the edges. Oh well, that happens with older decals. This model was completed on the 22nd of April, 2010, with a build that lasted really only a few hours.
(A quick note about the Testors Acryl Dark Sea Blue. I brush paint my models; I could airbrush, but prefer that my Paasche be used for my artwork. For some reason, this color has a tendency to bubble up in some places. It might be the age of that bottle, certainly a few years old. The Wildcat, sadly, has a few more bubbles than I care for.)
The Corsair is straight from the box, a Testors release from dies that quite probably date back to those recognition models of World War II. This model is a real mix bag; it has recessed panel lines but a flat deck for a cockpit, the pilot being just shoulders and a head. Engine detail is lacking but the landing gear look nice.


This model is painted for late war, again overall glossy sea blue. Markings are for VF-84, USS Bunker Hill, early 1945. A very simple model, no modifications were made; kit was build late Decmber, 2007.
Perhaps these aren't the most detailed or well painted models, but for me, they were great fun to build.